使用 Hugo 创建个人 Blog
摘要
- 你得先有个 GitHub 账号
- Hugo 是什么?
- Hugo 特色
- 安装 Hugo
- Hugo Themes
- Hugo 子命令
- 创建一个站点目录
- 添加主题
- 推送到 GitHub 上
- 配置 404 页面
- GitHub Page 相关限制说明
你得先有个 GitHub 账号
在上一篇 如何在 GitHub 上创建 repository 中介绍了如何在 GitHub 上注册账号及个人仓库的详细步骤,如果你已有账号可以跳过此节,继续往下。
这篇文章我们延续上一章使用 registerforxxx.github.io 作为案例。
Hugo 是什么?
引用 官方 结束的一句话
Hugo is a fast and modern static site generator written in Go, and designed to make website creation fun again
一句话总结:Hugo 是一个静态网站生成器 😆。
往往我们创建一个网站需要需要比较专业的前期准备,譬如建立复杂的运行时、依赖项和数据库等等,通过 Hugo 这个工具,你可以省去上述对咋们小白不友好的步骤搞定一个自己网站。
当你完成一篇文章后,Hugo 会对你的文章进行加工输出静态页面,我们只需要将这些静态页面存放(推送)到个人静态站点上即可。这篇文章我们使用 GitHub Pages 作为我们的静态站点,如何创建 GitHub Pages 可以参考 这篇文章 的最后一步。
Hugo 特色
- 可以设置草稿箱,文章发布时间,文章过期时间
- 热加载,如果把 Hugo 作为站点服务器,更新内容后不需要重启服务,因为Hugo 会自动监控变化并更新页面内容,就算不使用 Hugo 作为站点服务器,在本地打草稿的时候也可以开启热加载,实时预览变化内容
- 主题风格超多,选择一种拿来即用
- 区分开发目录及发布目录,可以避免不必要的内容被暴露
- 支持国际化
安装 Hugo
- Mac 系统安装
brew install hugo
- Linux 系统安装
snap install hugo
- Windows 系统安装
choco install hugo -confirm
或者:
choco install hugo-extended -confirm
除了上述通过命令行方式安装外,还可以直接在其 GitHub releases 地址下载对应压缩包。
由于笔者的系统为 macOS 我们已此为例,更详细的安装说明可以参考 官方文档 。
安装完成后可以测试如下:
$ hugo version
Hugo Static Site Generator v0.60.1/extended darwin/amd64 BuildDate: xxx
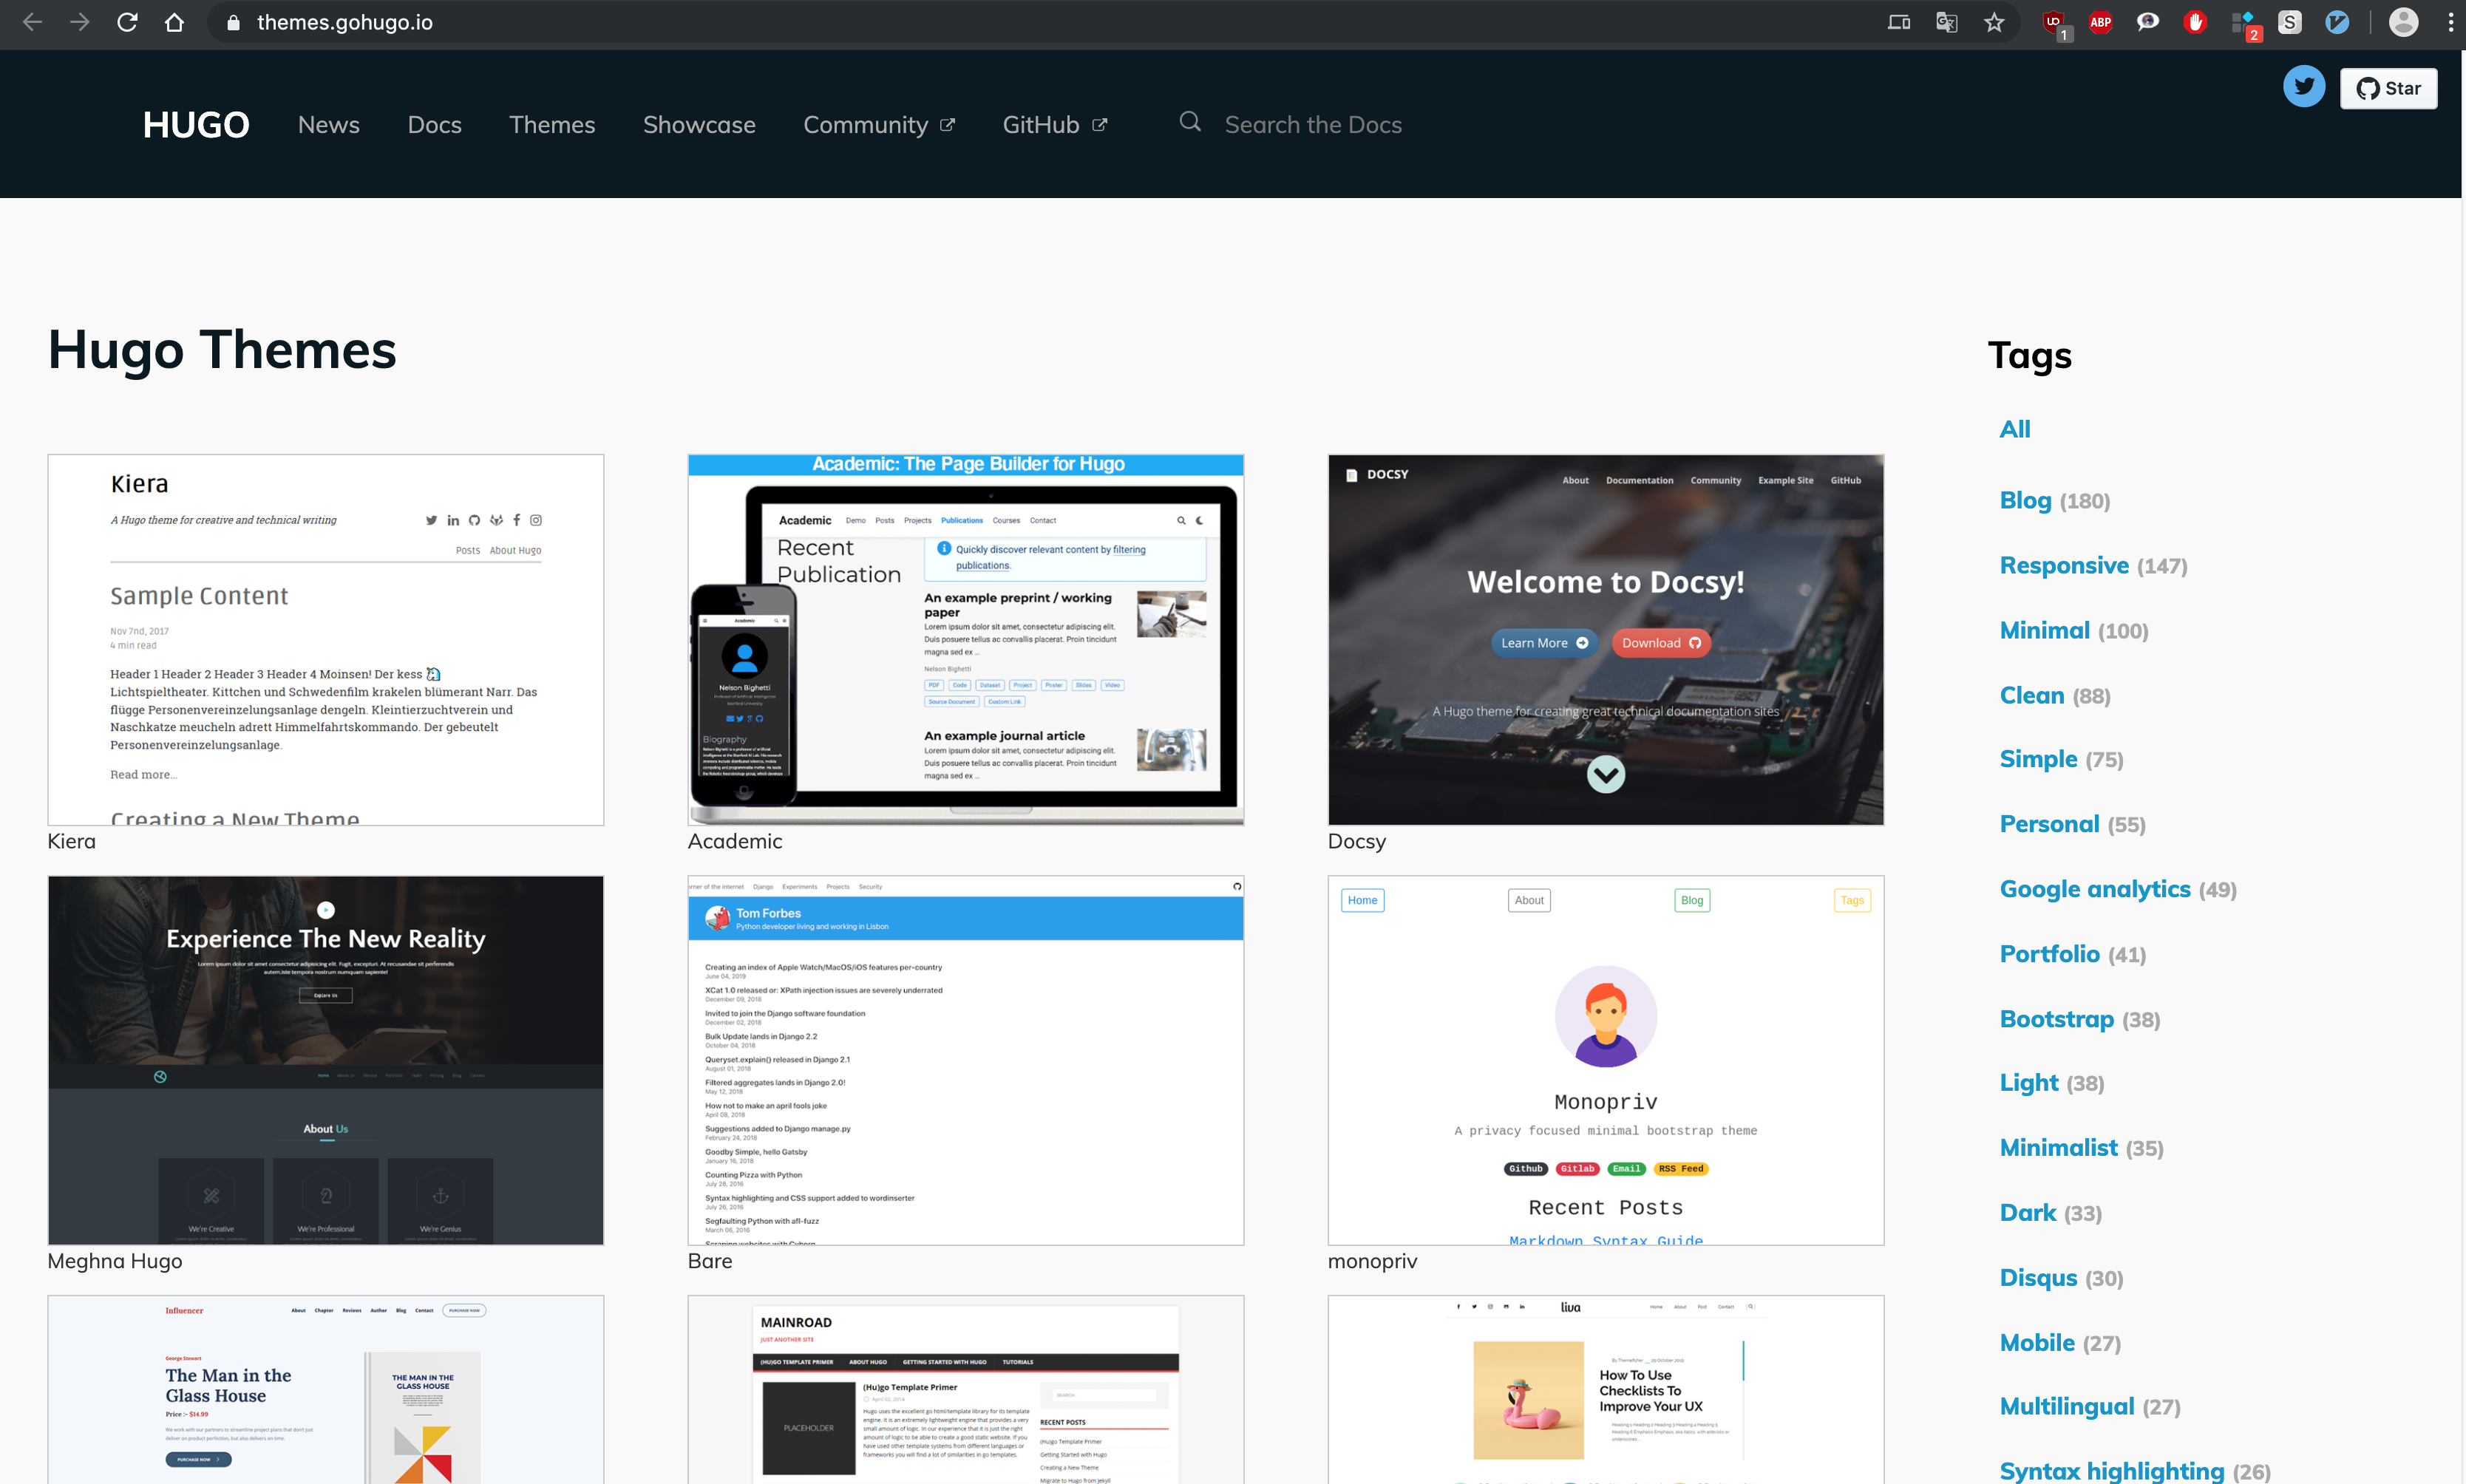
Hugo Themes
Hugo 主题 特别多,不止博客风格。连各类网站风格也有
Hugo 子命令
Hugo 有不少子命令, 使用 help 输出如下
~ $ hugo -h
hugo is the main command, used to build your Hugo site.

Hugo is a Fast and Flexible Static Site Generator
built with love by spf13 and friends in Go.

Complete documentation is available at http://gohugo.io/.

Usage:
  hugo [flags]
  hugo [command]

Available Commands:
  check       Contains some verification checks
  config      Print the site configuration
  convert     Convert your content to different formats
  deploy      Deploy your site to a Cloud provider.
  env         Print Hugo version and environment info
  gen         A collection of several useful generators.
  help        Help about any command
  import      Import your site from others.
  list        Listing out various types of content
  mod         Various Hugo Modules helpers.
  new         Create new content for your site
  server      A high performance webserver
  version     Print the version number of Hugo
创建一个站点目录
创建一个站点我们需要使用 new 子命令,具体用法查看如下:
~ $ hugo new --help
Create a new content file and automatically set the date and title.
It will guess which kind of file to create based on the path provided.

You can also specify the kind with `-k KIND`.

If archetypes are provided in your theme or site, they will be used.

Ensure you run this within the root directory of your site.

Usage:
  hugo new [path] [flags]
  hugo new [command]

Available Commands:
  site        Create a new site (skeleton)
  theme       Create a new theme
这里使用 sites 目录作为个人站点上级目录,然后在当前目录下创建一个名为 github.io 的项目
sites $ hugo new site github.io
创建完成后可以看到自动生成相关目录如下:
sites $ tree # tree 命令查看当前目录结构
.
└── github.io # 创建的项目名(一个独立的目录)
    ├── archetypes
    │   └── default.md
    ├── config.toml # 配置文件
    ├── content # 文章放在这里
    ├── data
    ├── layouts
    ├── static
    └── themes # 主题放在这里
添加主题
接着选择一个主题作为个人站点主题,这里举例选择了 Hermit 这个主题,按照 Getting started 的步骤,我们需要执行如下命令将这个主题添加进来
github.io $ git clone https://github.com/Track3/hermit.git themes/hermit
拷贝该主题默认的配置文件
github.io $ cp themes/hermit/exampleSite/config.toml .
执行 server 子命令启动本地预览功能,默认会绑定到 1313 端口
github.io $ hugo server
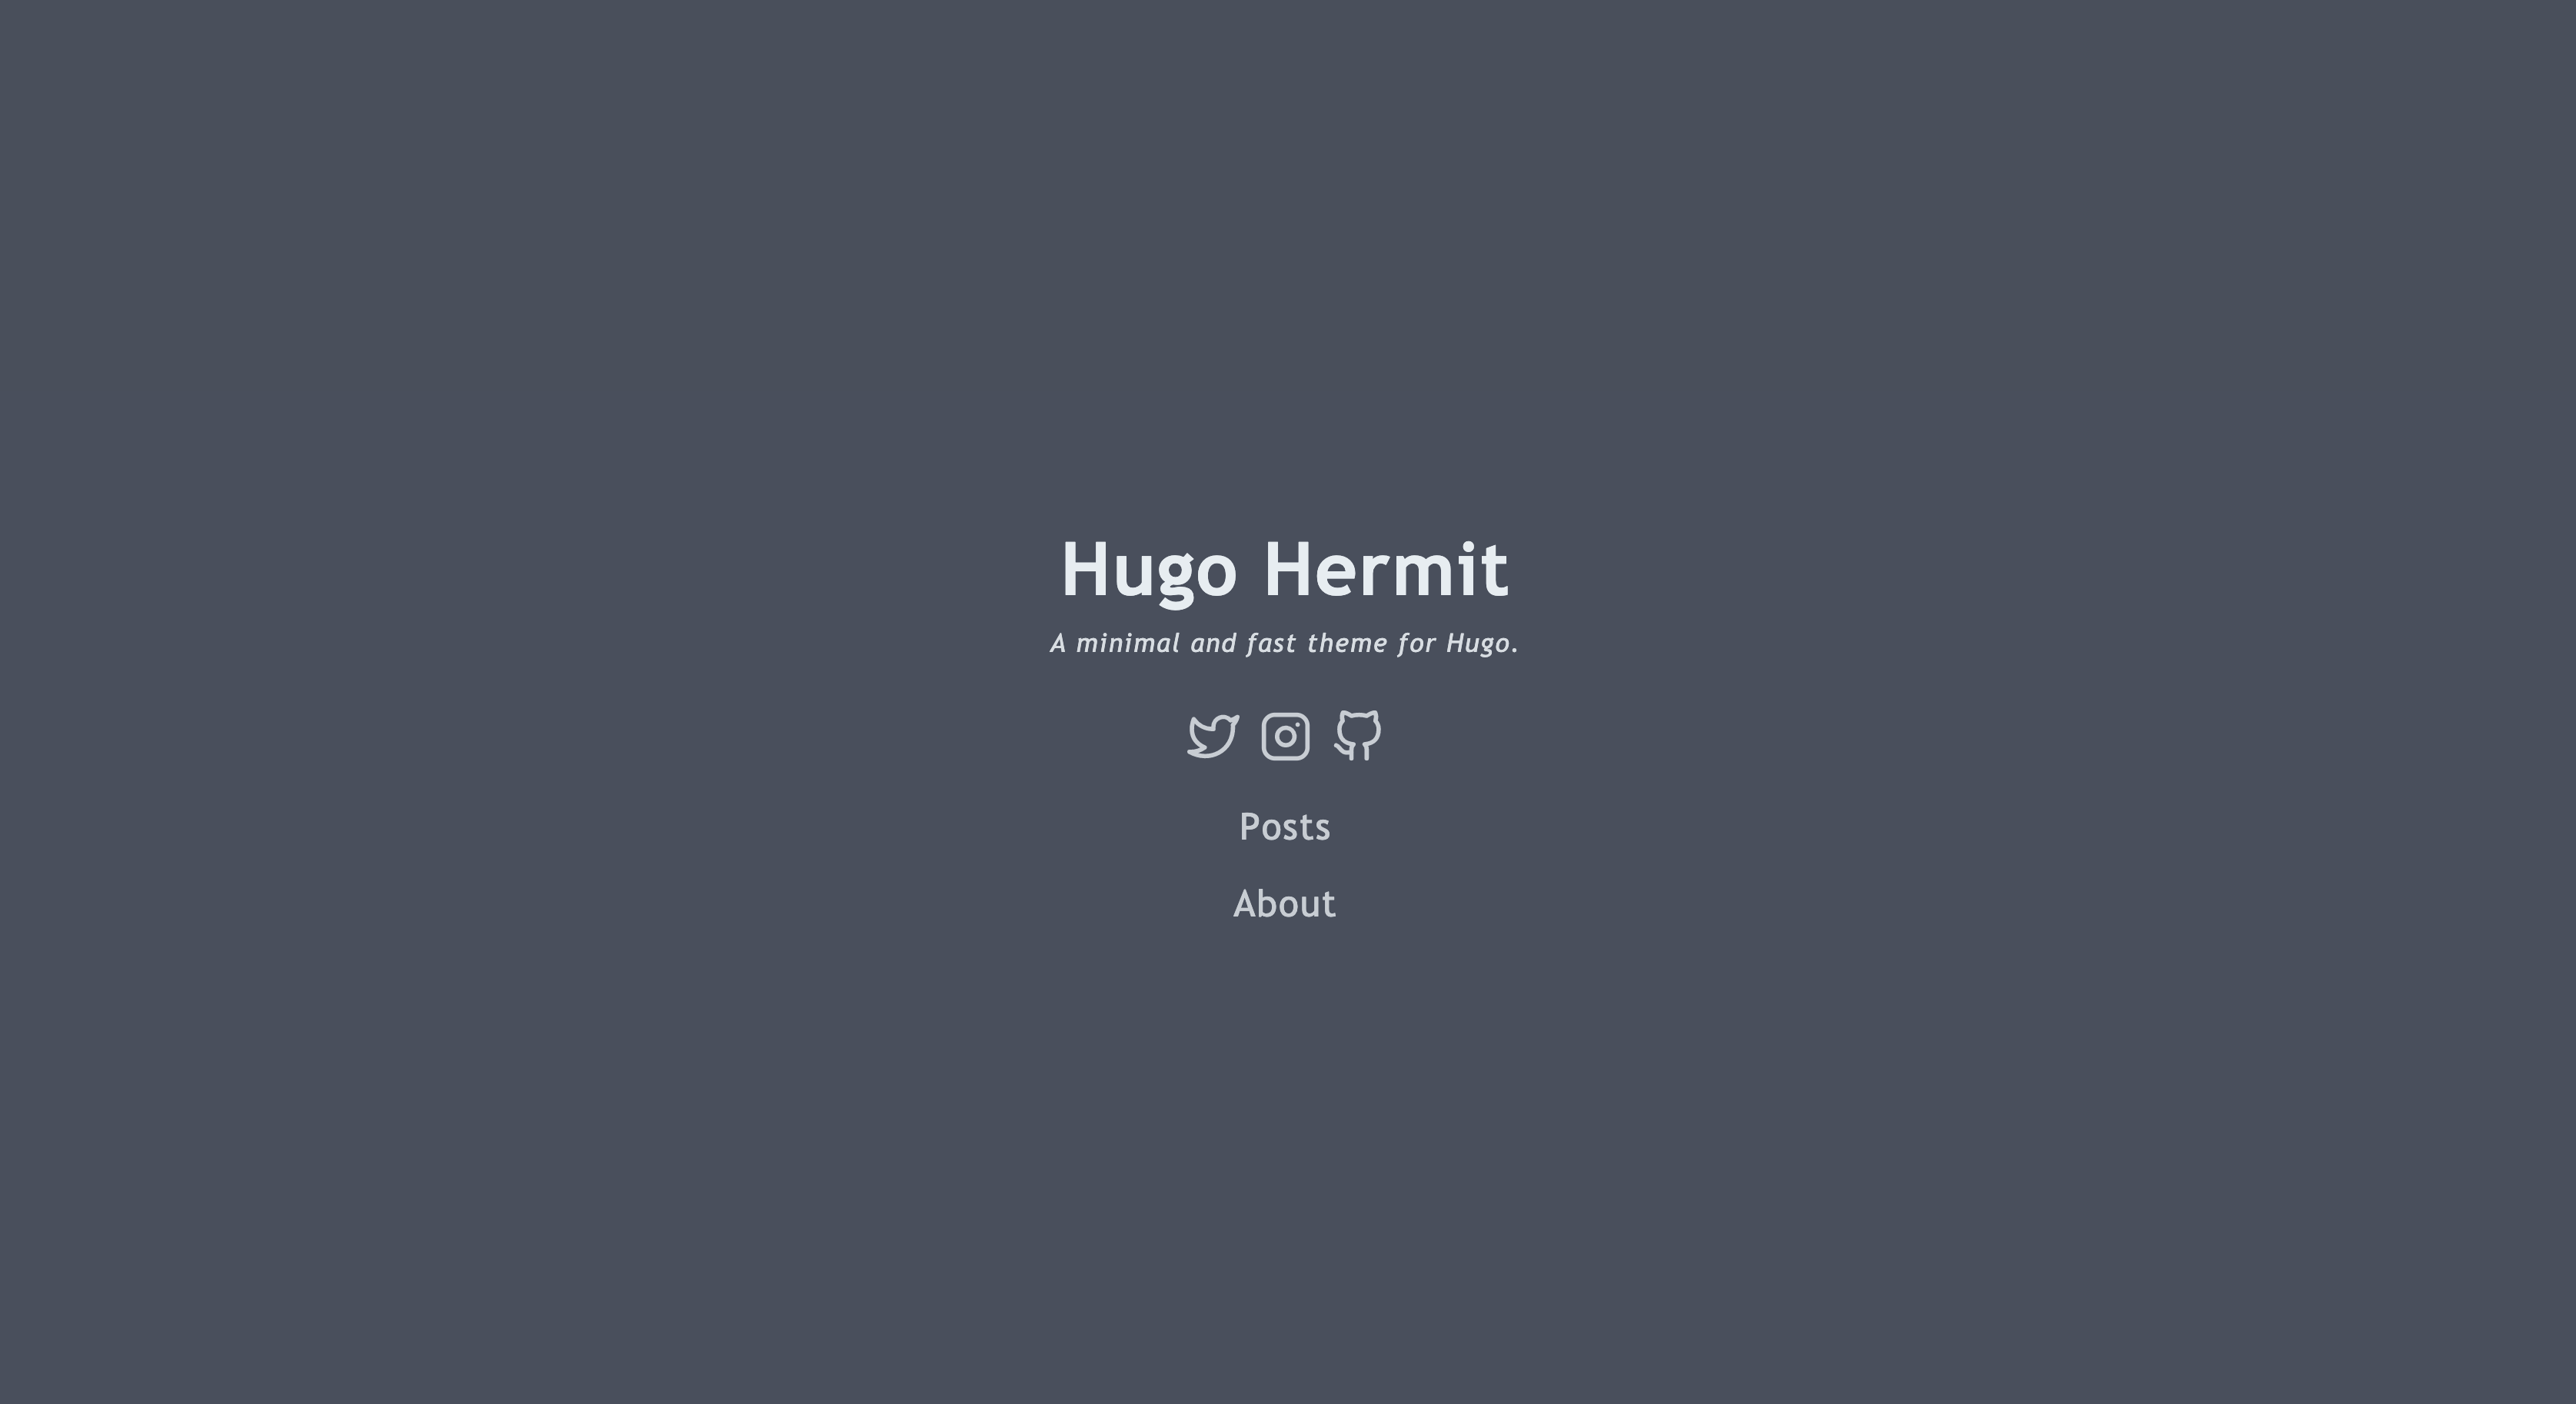
打开浏览器,输入 http://localhost:1313 可以看到这个文章最开始的界面了,但是由于我们还没有任何的文章,所以点击网页上的相关链接会出现 404
为了进一步看到和 Hermit 这个 Demo 一样的效果,我们可以把他的文章内容拷贝过来
github.io $ cp -r themes/hermit/exampleSite/content/* ./content/
注意,由于 Hugo 默认开启了热加载功能,我们不需要中断已启动的 Hugo 服务,可以在另外一个终端窗口的当前目录下执行该语句,同时可以看到原来启动服务的终端输出不少提示信息表示内容已更新,这时候点击页面上的链接就有内容了。
推送到 GitHub 上
最后我们需要将其推送到准备好的 GitHub 上,不过推送前有几个地方需要注意:
-
推送前我们需要执行
hugo生成最终的静态页面,默认会导出到public目录下 -
导出静态页面前我们需要更新
config.toml配置文件,将baseURL = "https://example.com"改成我们自己的域名,由于当前案例使用的是registerforxxx.github.io,更新后为baseURL = "https://registerforxxx.github.io",这一步的缺失会直接导致页面的静态资源找不到,人话就是:一片空白除了文字~😤
执行命令导出最终的静态页面:
github.io $ hugo
打开案例项目地址,获取推送地址:
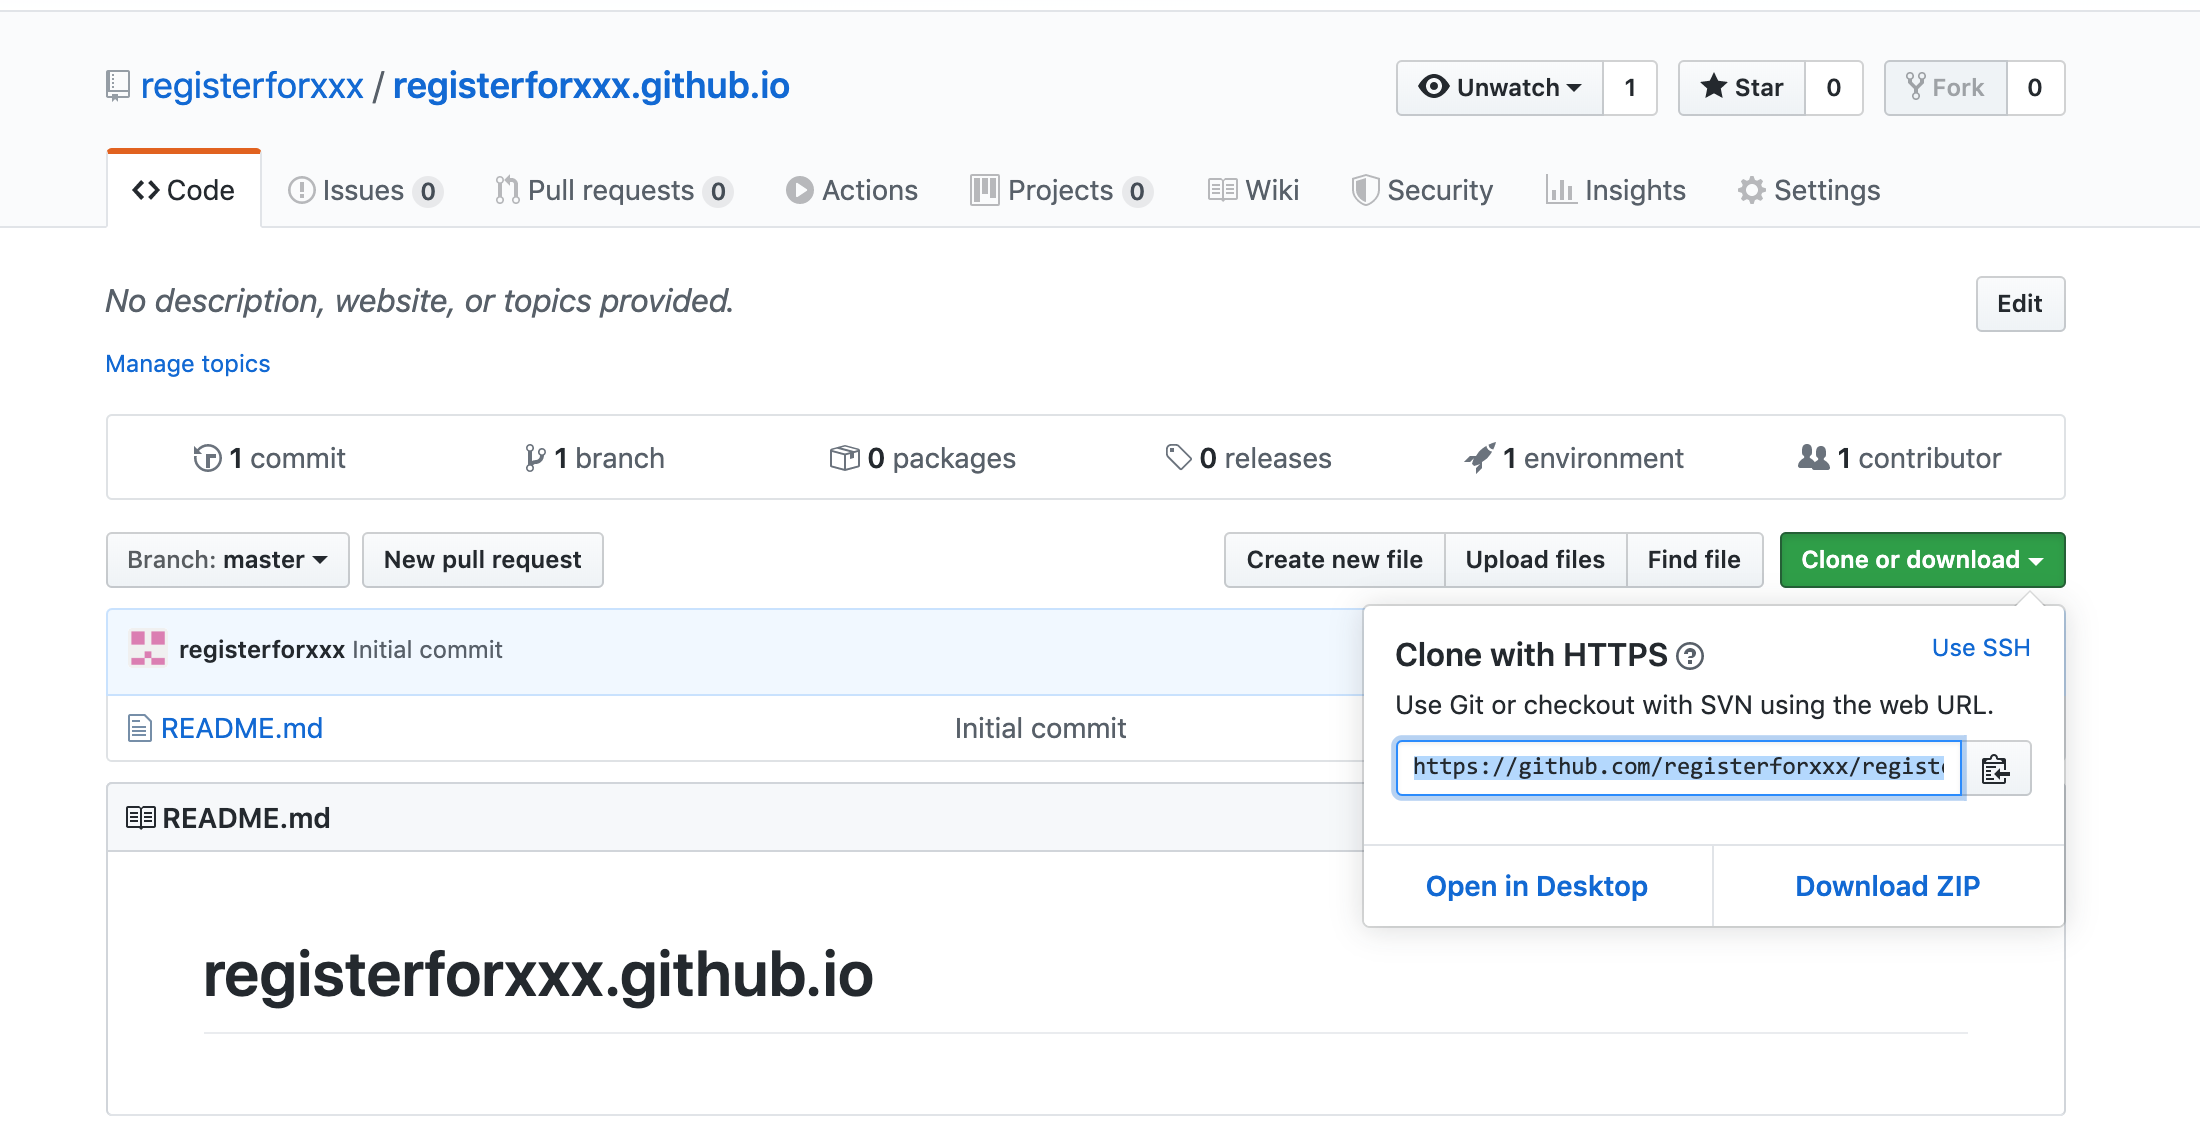
点击 clone or download 绿色按钮拷贝里面的地址,然后进入 public 子目录完成以下步骤
# 初始化 git 环境
public $ git init

# 执行 git remote add origin 上一步拷贝的地址
# 或者使用 ssh 方式
public $ git remote add origin https://github.com/registerforxxx/registerforxxx.github.io.git


public $ git add .
public $ git commit -am "first commit"
public $ git pull origin master
public $ git push -u origin master
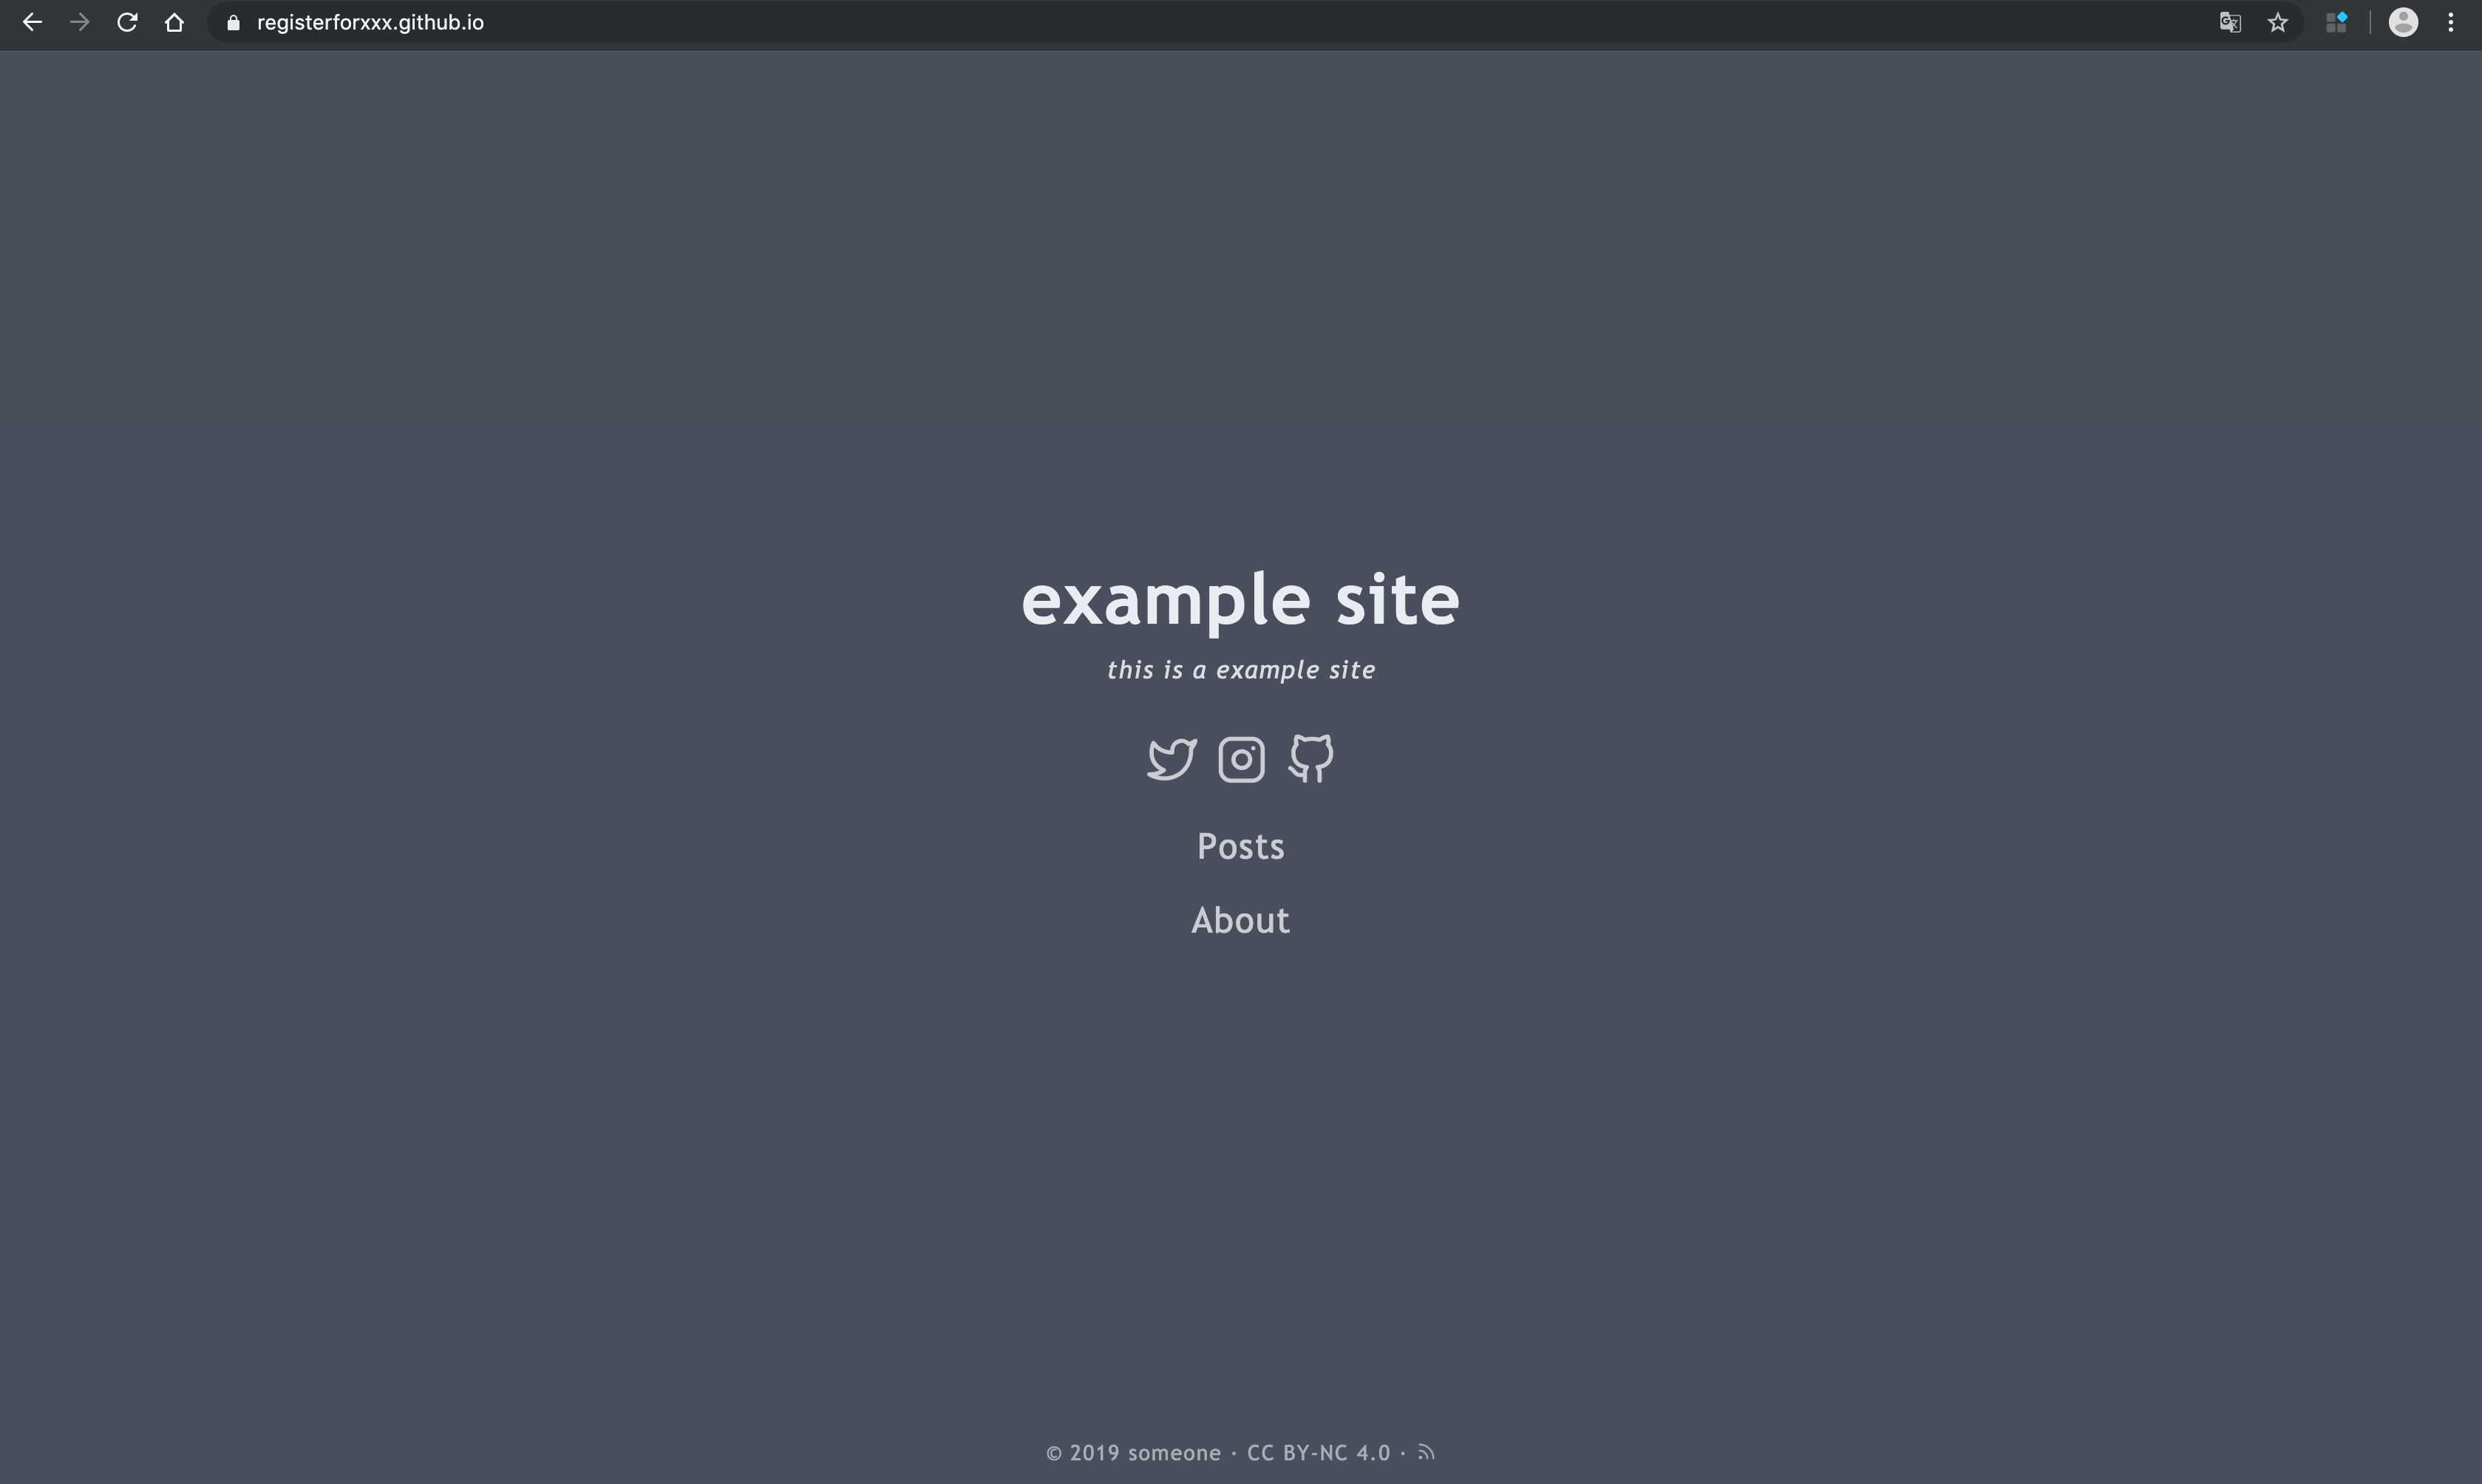
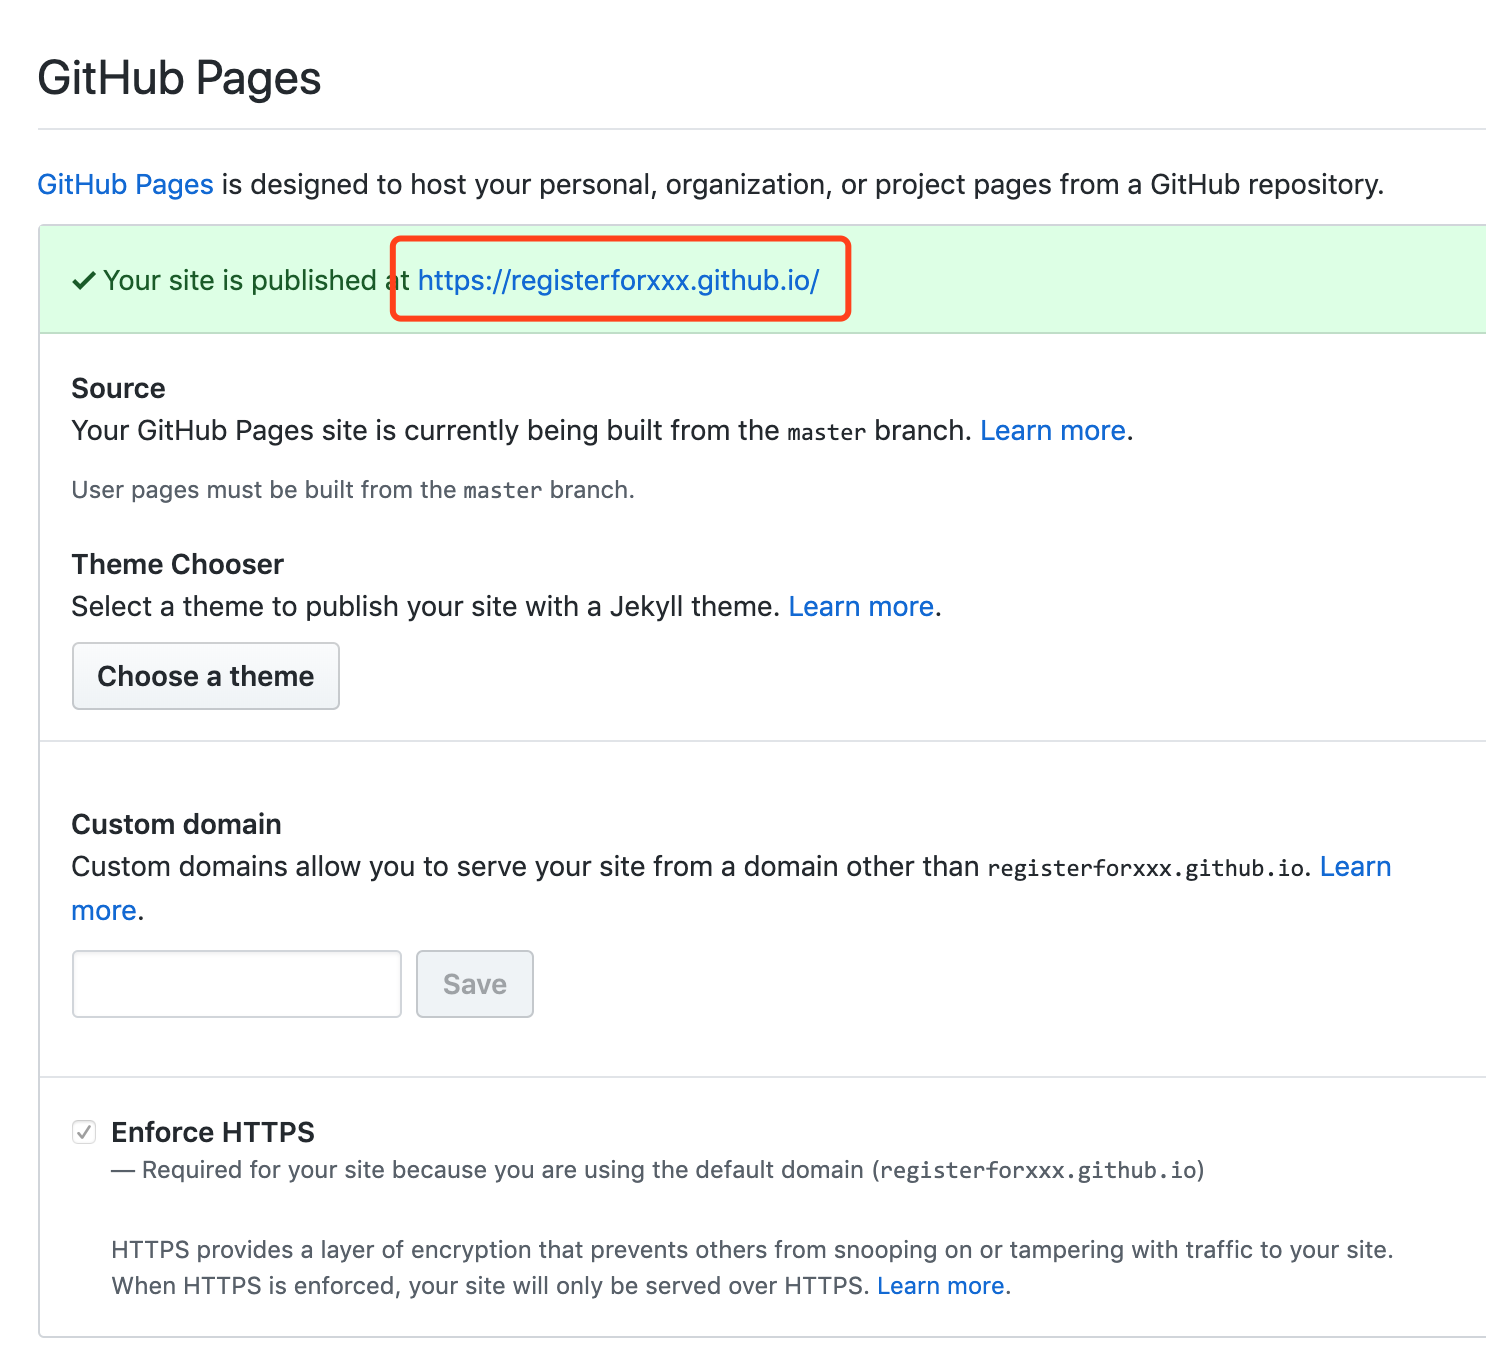
完成后我们便可以直接访问咋们的项目地址:https://registerforxxx.github.io/
如果不清楚生成的 GitHub Page 地址可以在这个位置找到👇
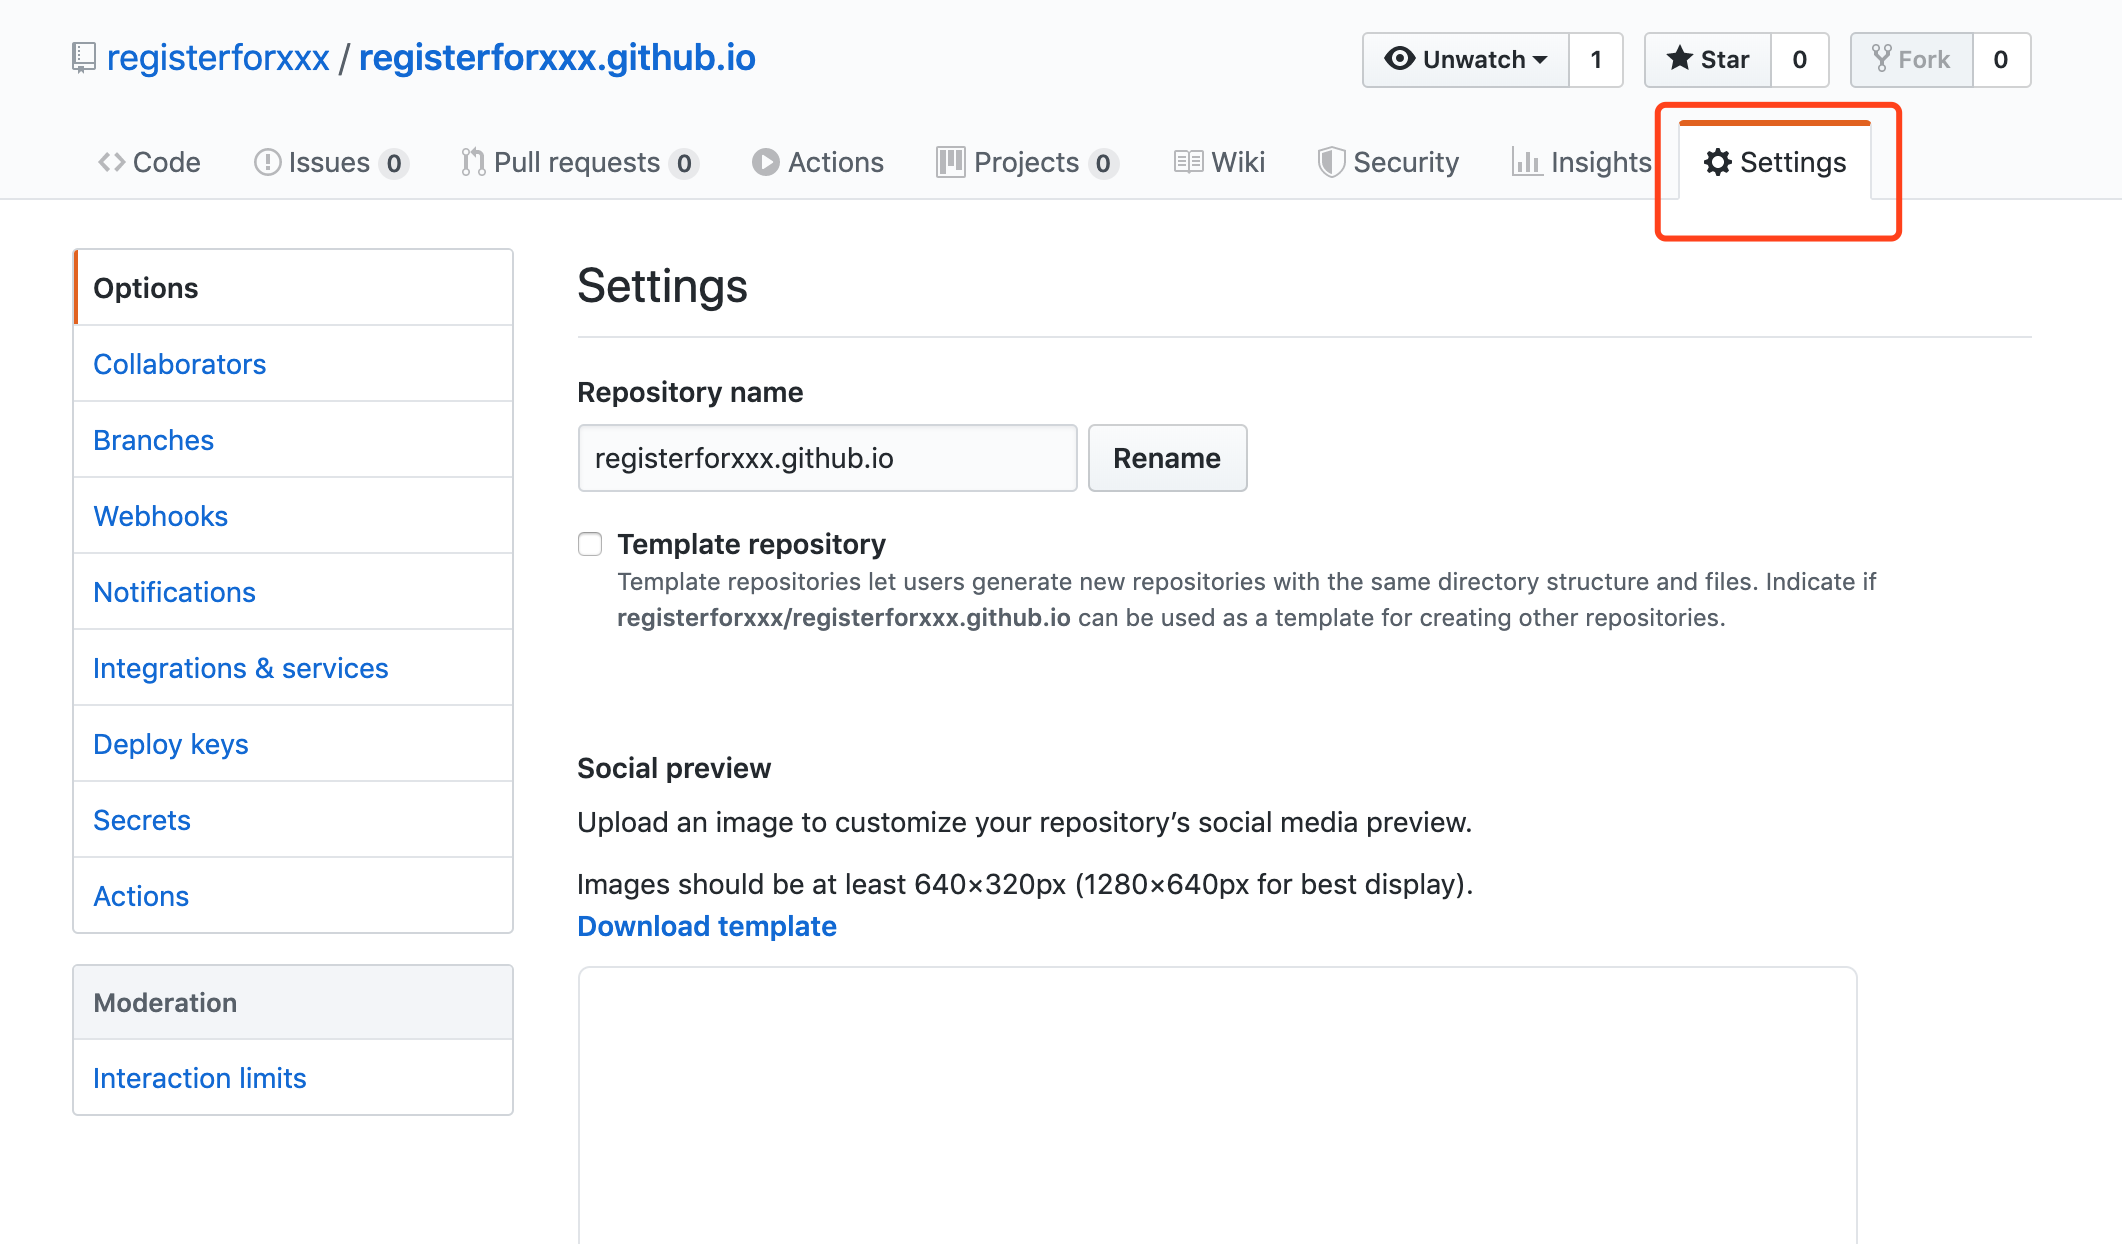
一直下拉到 GitHub Pages 板块便可看到具体地址,这里需要注意如果仓库没有任何内容是无法生成地址的。
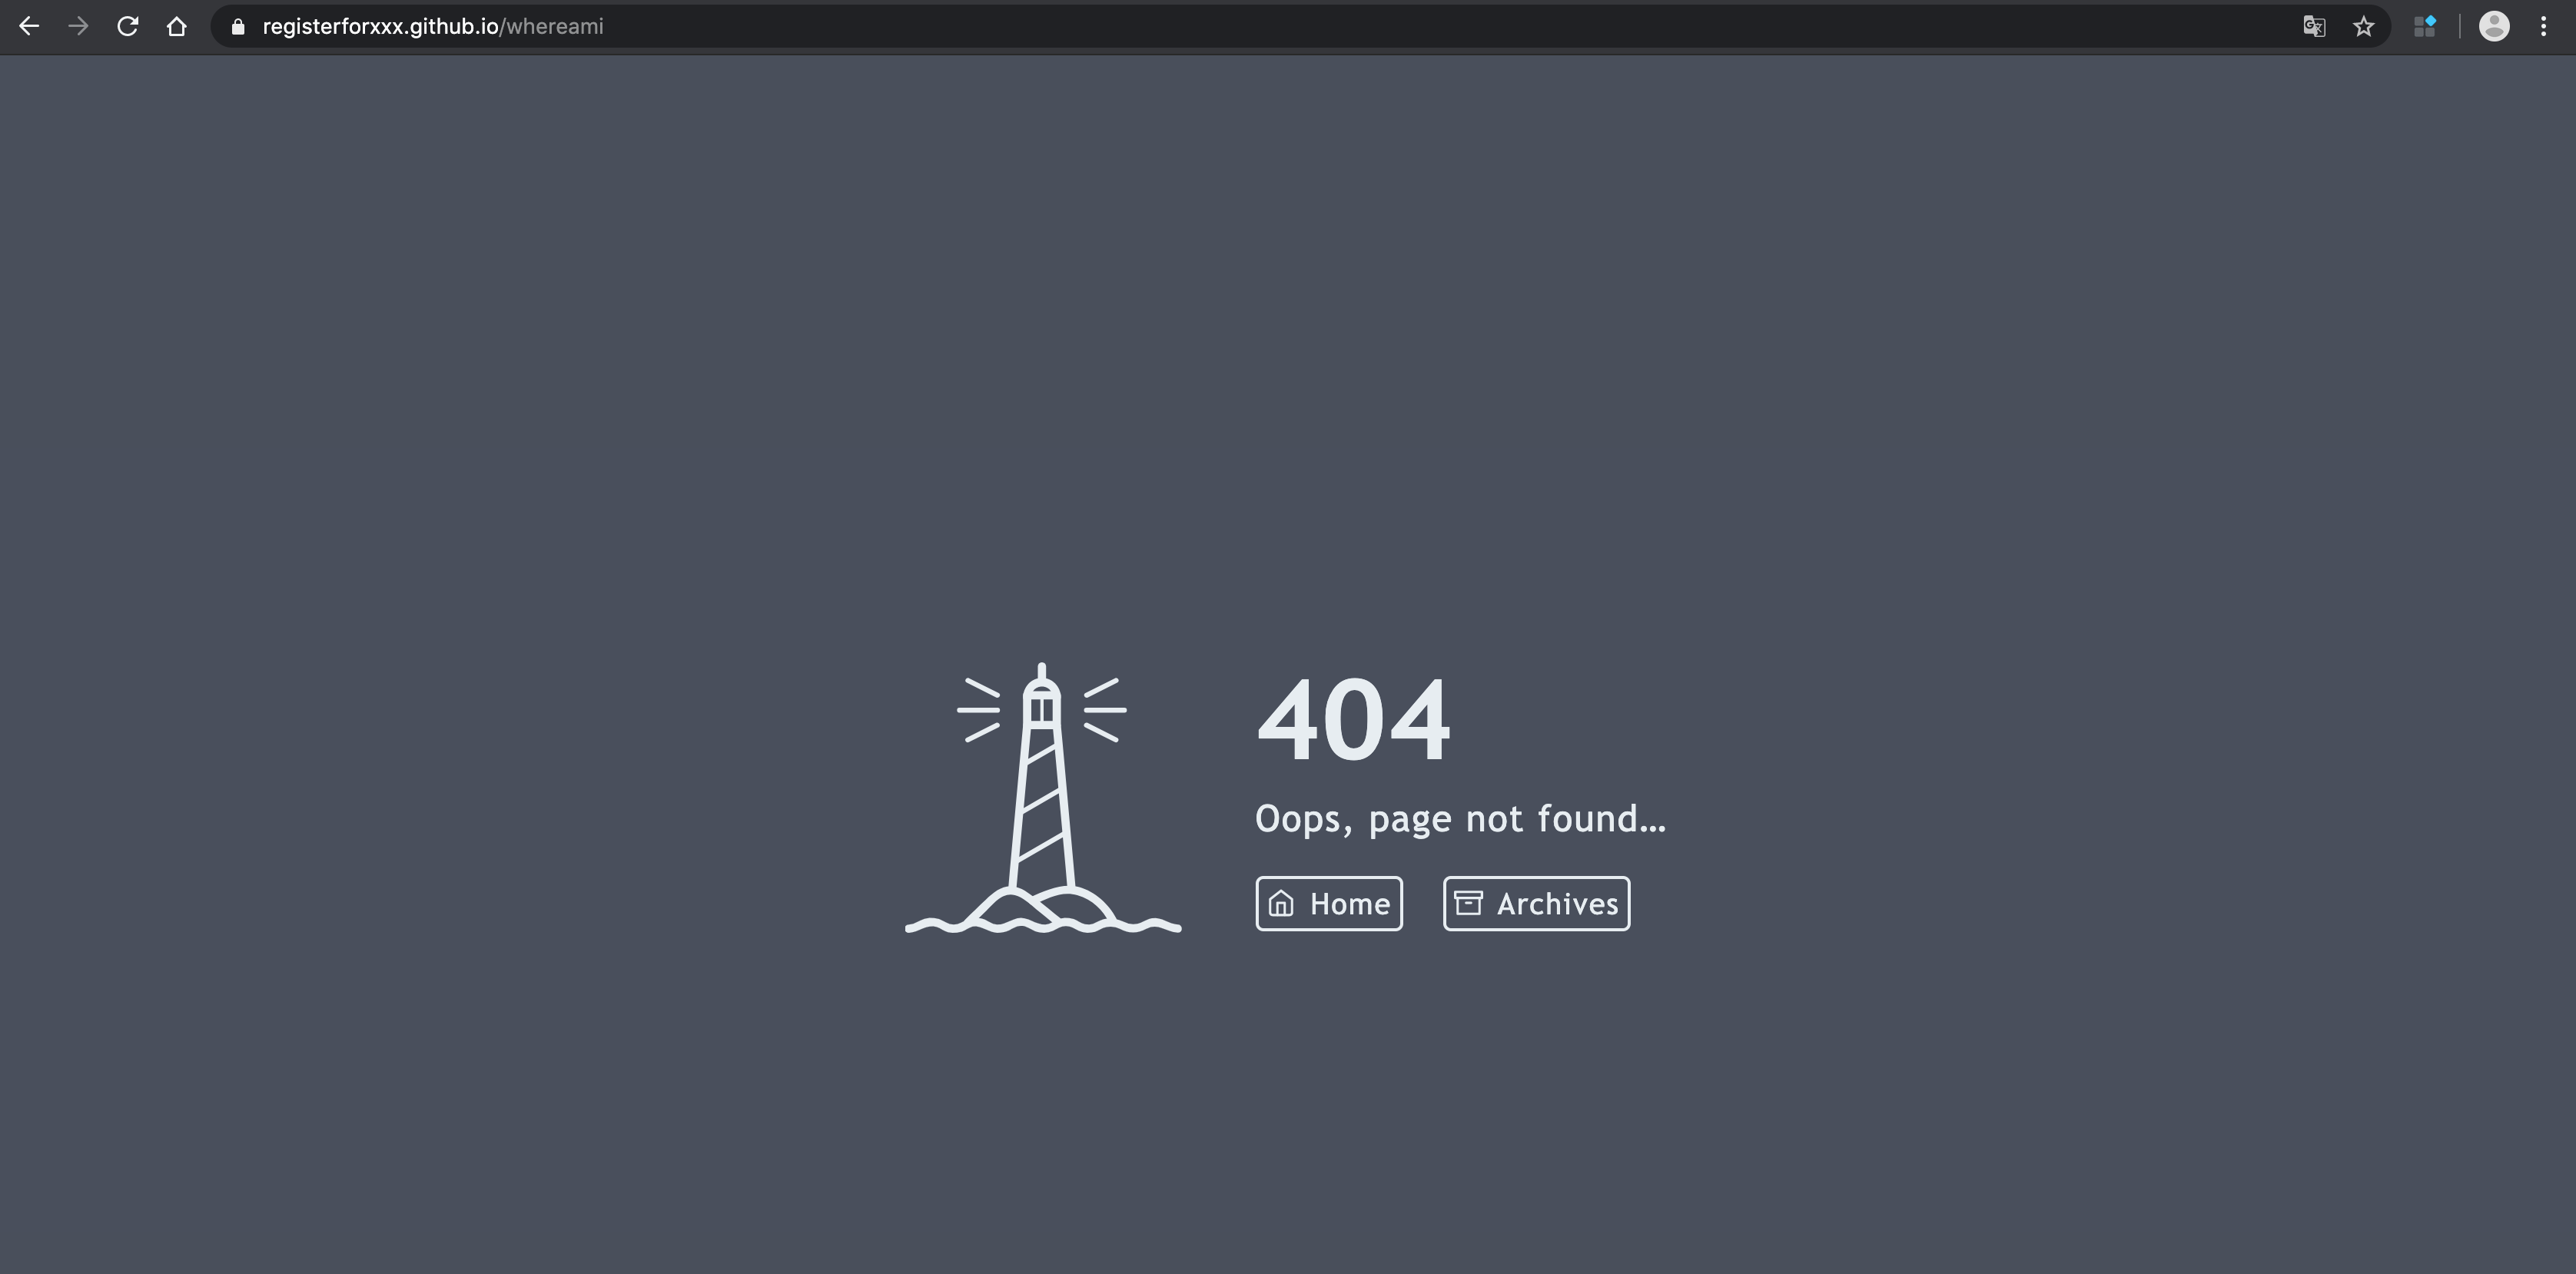
配置 404 页面
404 页面常见于用户访问一个不存在的资源,GitHub 默认支持 404 ,只需要你在项目根目录下存放一个 404.html
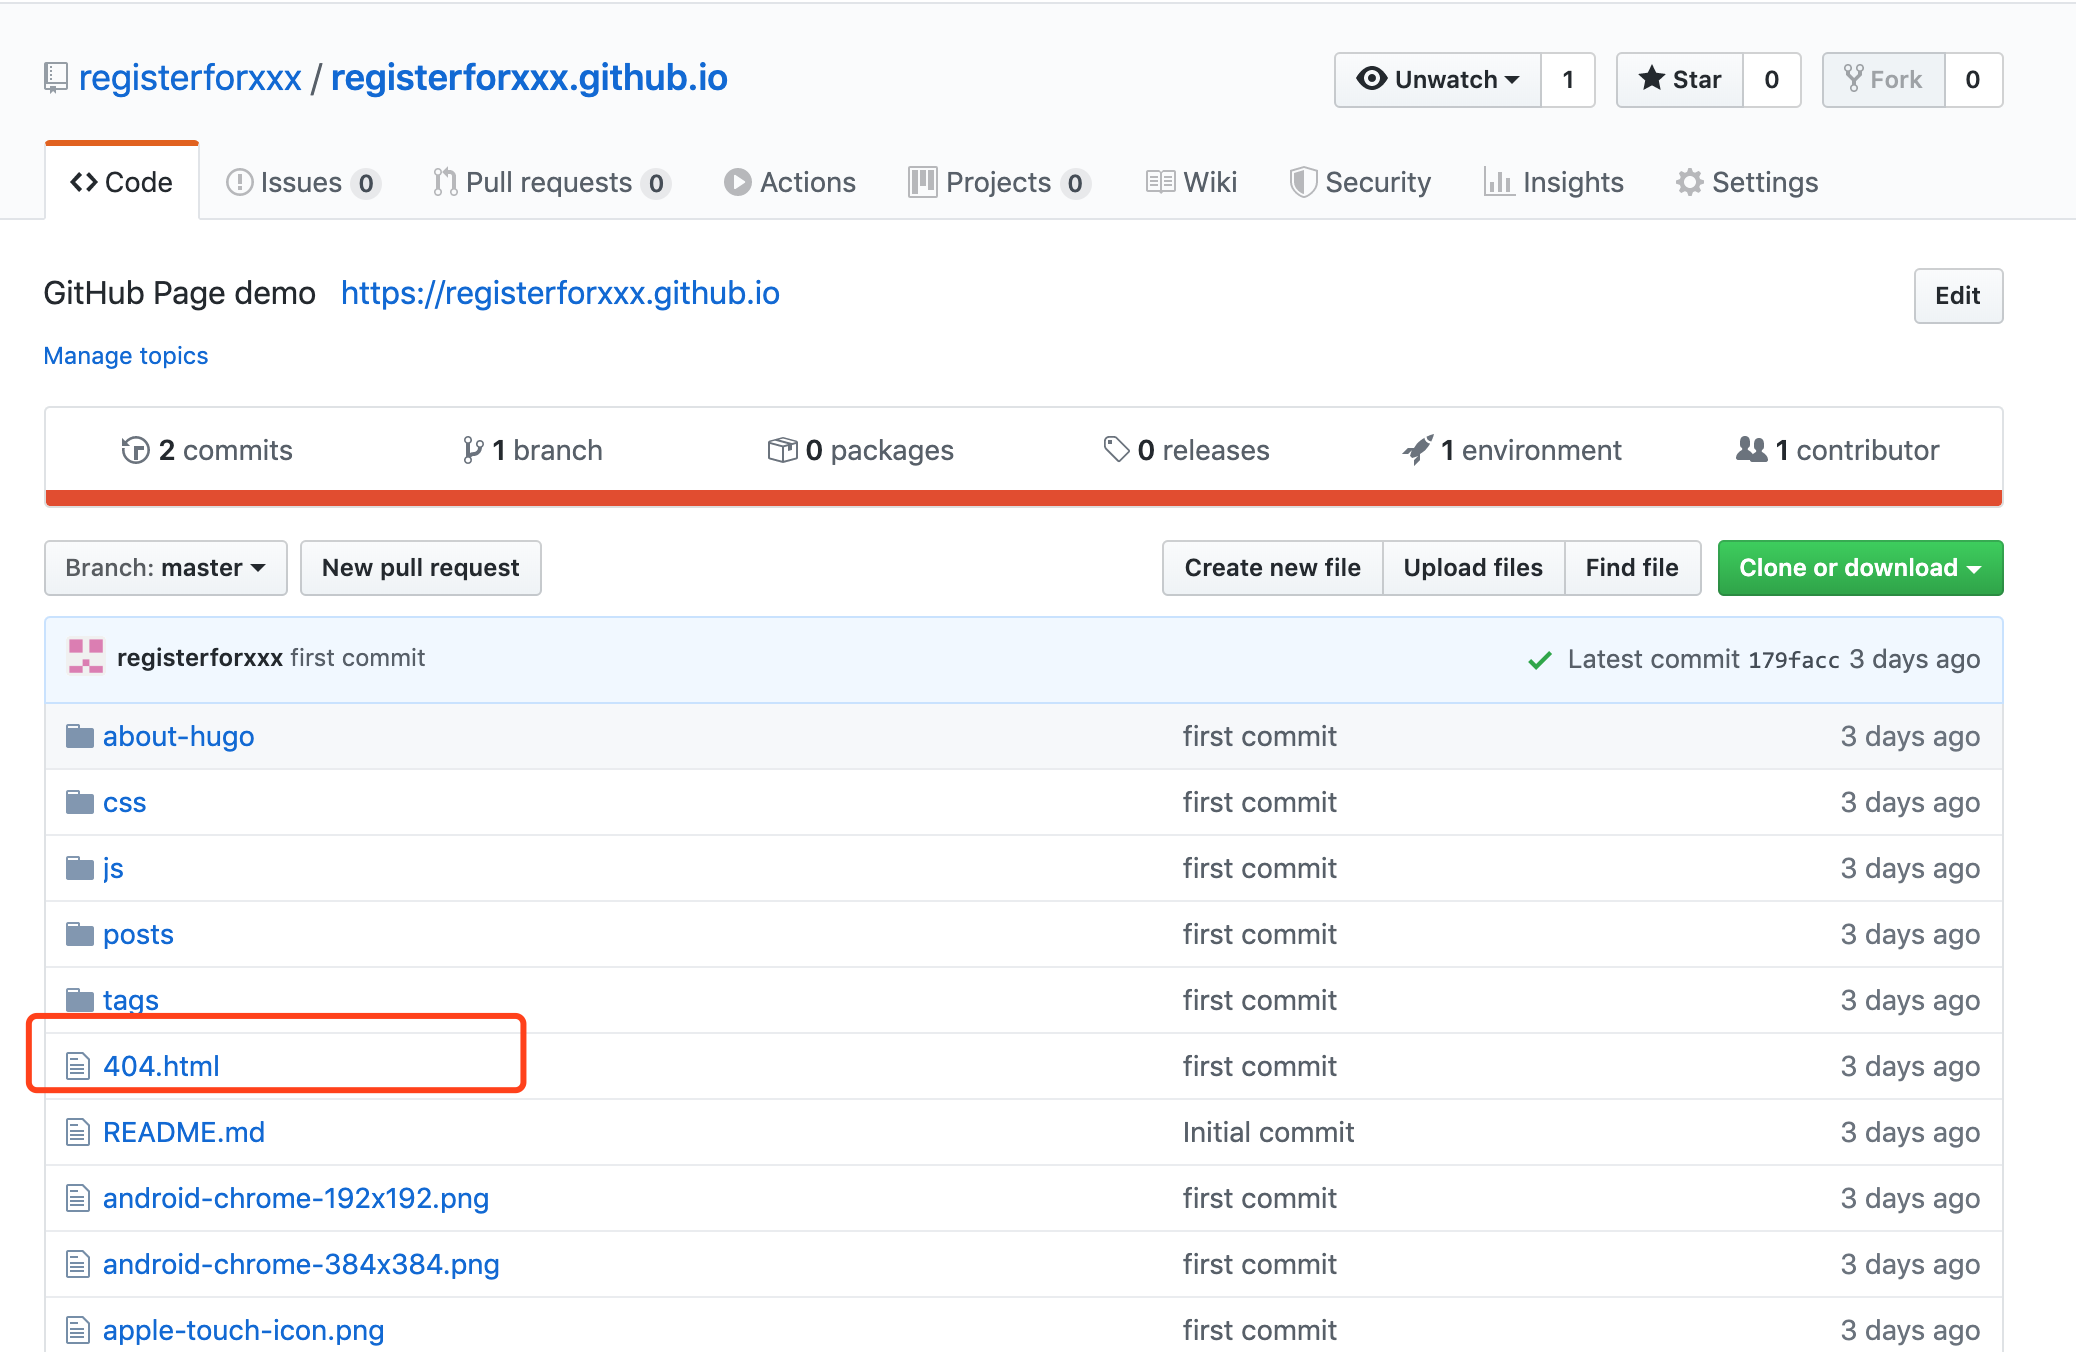
Hugo 的大部分主题都是包含 404 页面的,我们只需要把其推送到 GitHub 上即可。
GitHub Page 相关限制说明
GitHub Pages 站点受到以下使用限制的约束:
- GitHub Pages 源仓库建议的限制为 1GB。更多信息请参阅“我的磁盘配额是多少?”
- 发布的 GitHub Pages 站点不得超过 1 GB。
- GitHub Pages 站点的软带宽限制为每月 100GB。
- GitHub Pages 站点的软限制为每小时 10 次构建。
更多限制内容可以参考限制